Raspberry Pi (4) Kiosk / Wall Display / Dashboard
This post is about setting up a display with a Raspberry PI or similar computer using Linux, potentially raspbian / n00bs on an sd card and a screen. The Raspberry Pi 4 has some respectable specs is quiet, displays up to 4k and has Wi-Fi which makes it a pretty great dashboard display source.
When you create a dashboard, aim for something that can run as a website and that takes care of refreshing itself, otherwise you can also make whatever browser you choose take care of that.
No matter if you roll it yourself or use one of the numerous services like Google Analytics, Geckoboard, Dasheroo, Kibana or what ever you can come to think of, you'll probably want a browser to display them.
If you're still considering to get a Raspberry PI maybe get an on/off switch and a heat sink as well (US referral link), because they get a bit hot (80°) without cooling.
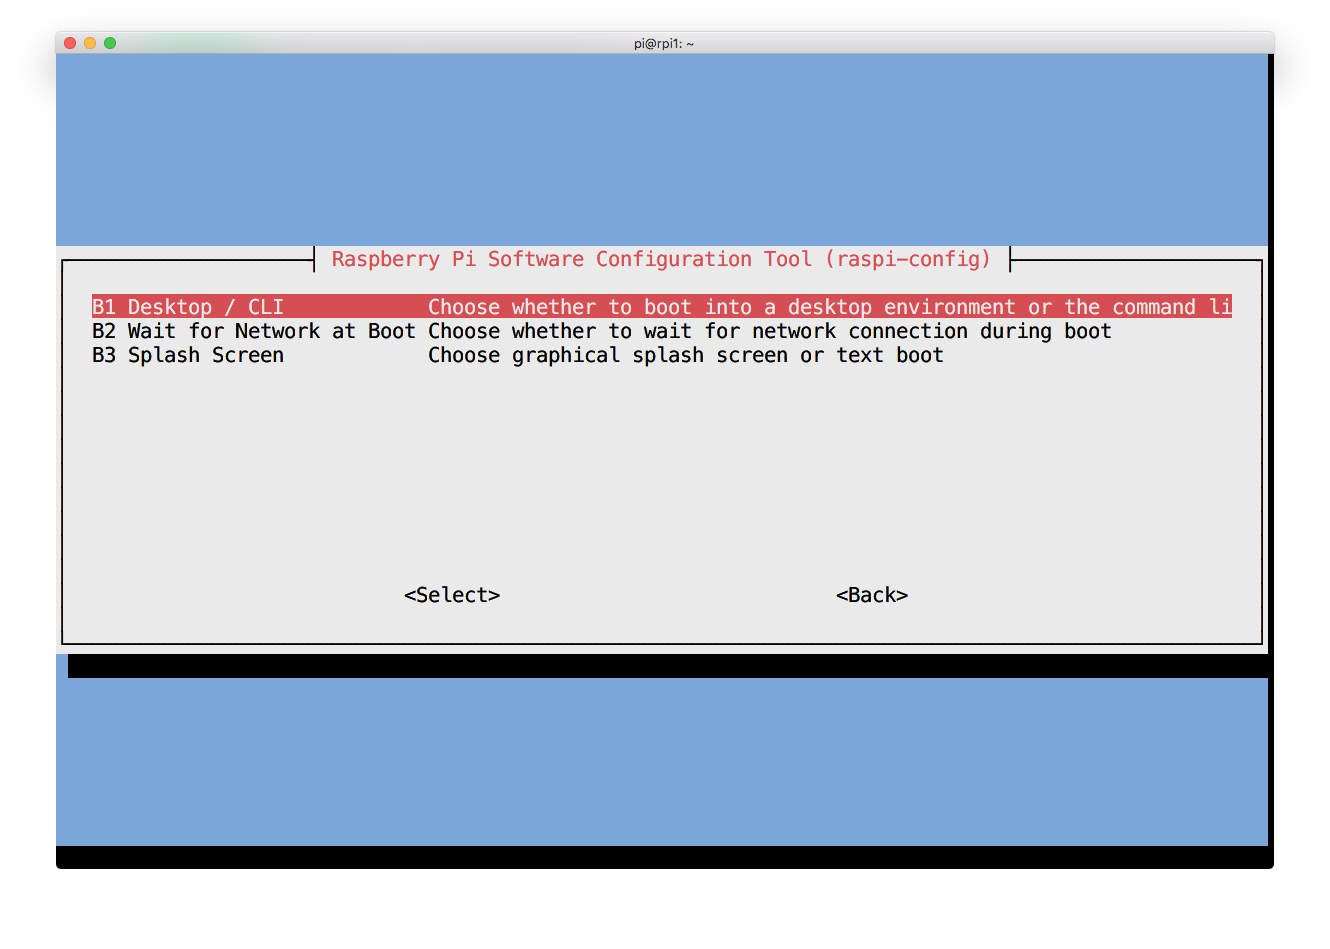
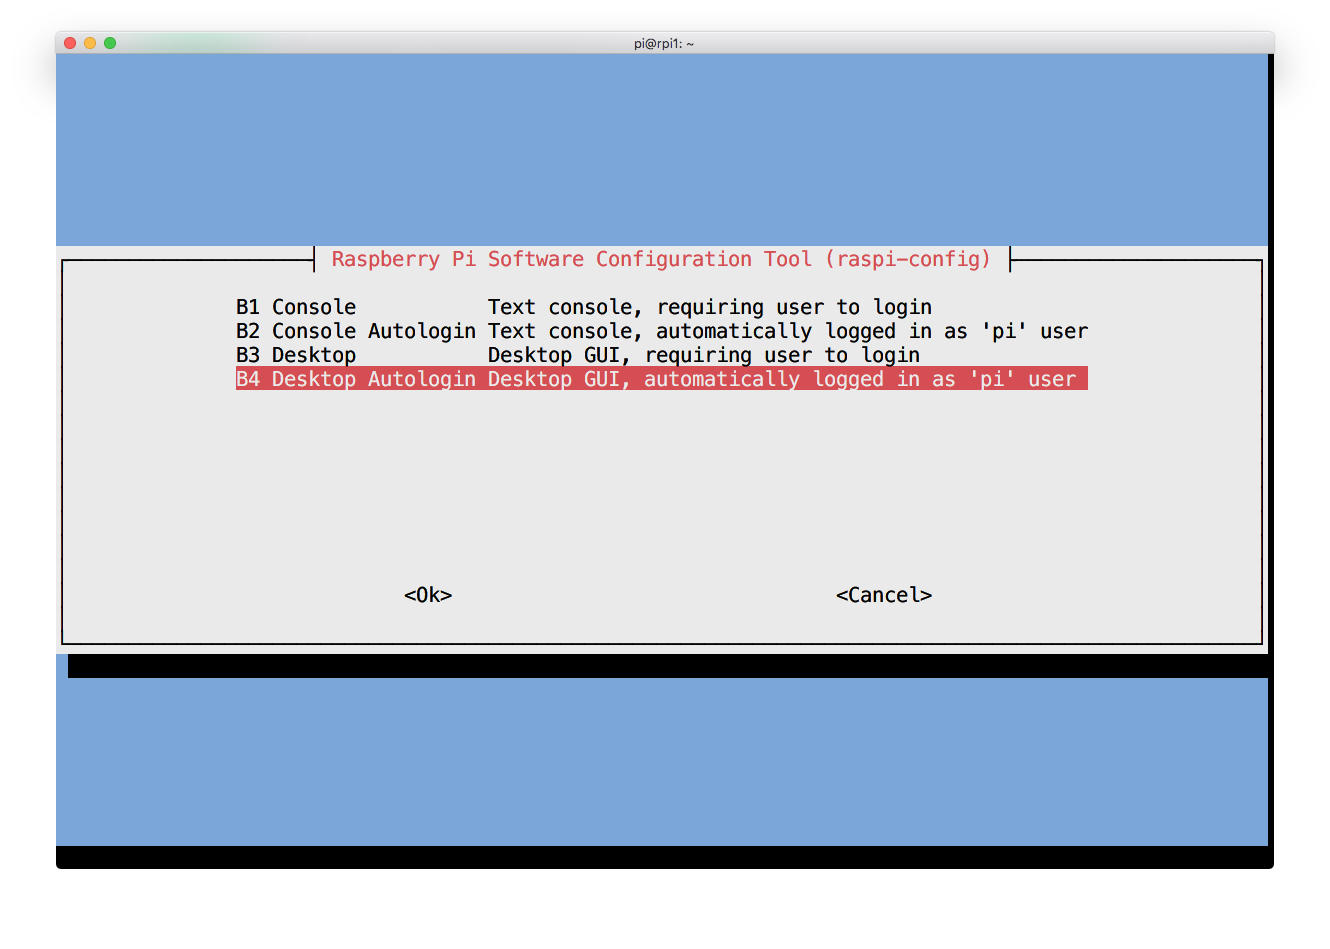
Configuring the Raspberry Pi for Automatic Login
Since you're likely to disconnect and remove keyboard and mouse after this setup is done, we should make sure that our Raspberry Pi can login automatically.
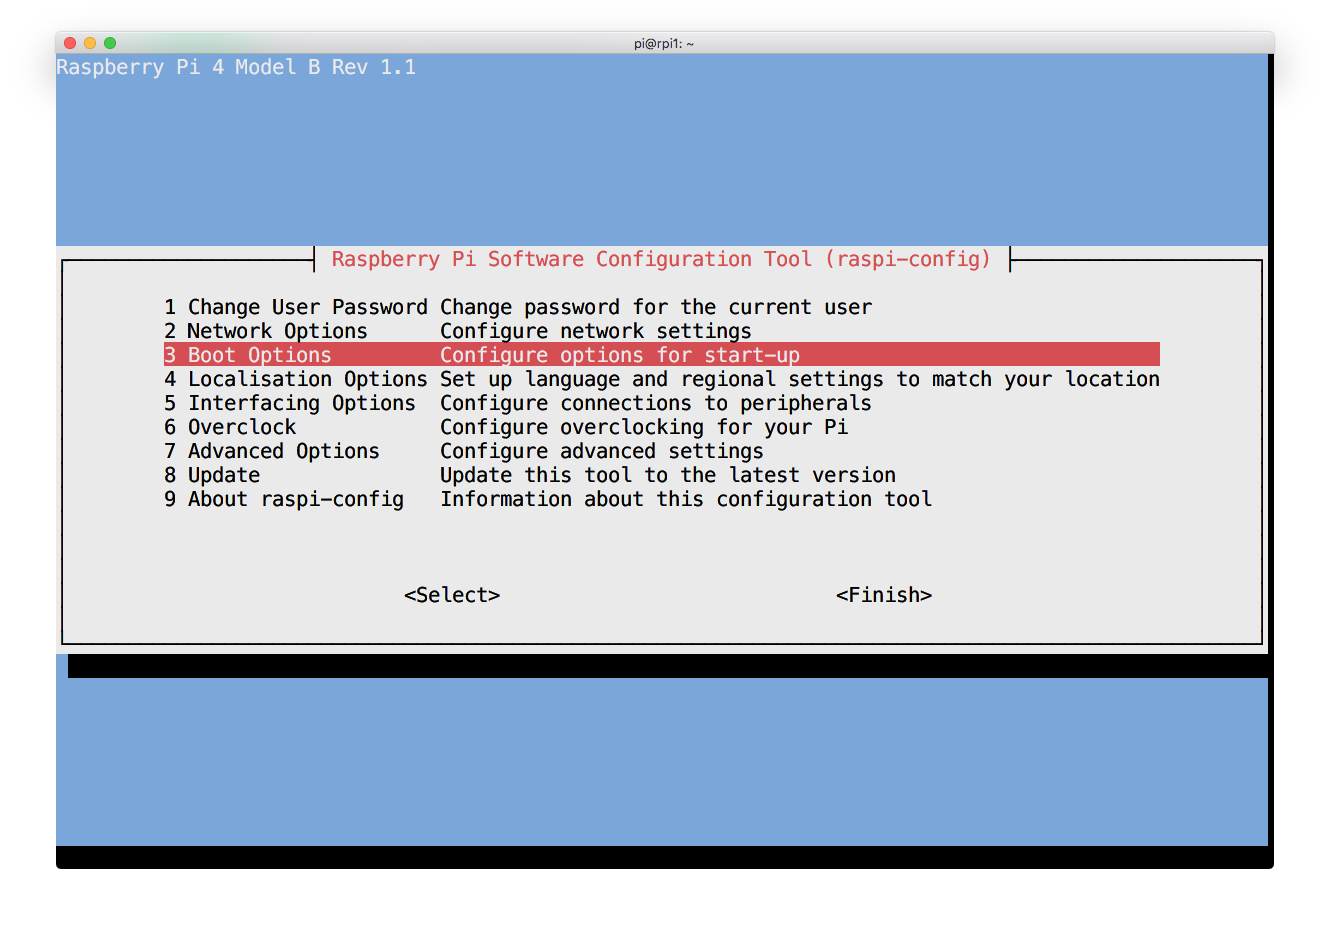
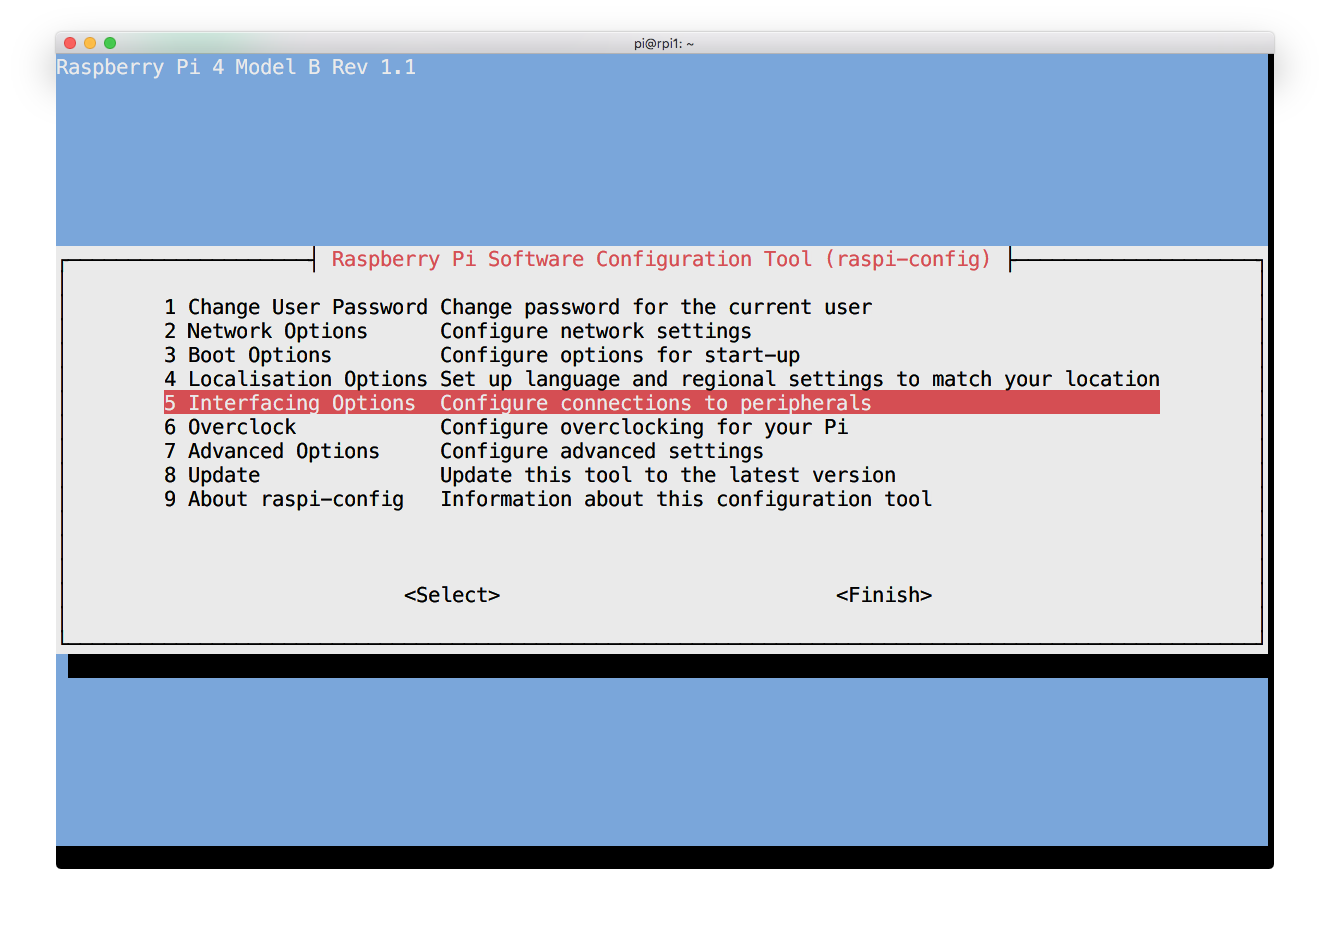
Open a terminal and run sudo raspi-config.
Automatically Start Dashboard / Kiosk on Startup
When the power goes out or when something seems to have crashed, you'll most likely want your display to go back to the state it was in before the outage, as soon as the power comes back up. Since the Raspberry Pi does not have a power switch, but just boots when you hook it up to a power source, you'll need to create a systemd service, which is a simple file that specifies what kind of program you want to run on startup.
Let's go ahead and create our systemd unit file at the right location:
sudo touch /etc/systemd/system/dashboard.service
and let's enter the following content, via vim or other text editors:
sudo xdg-open /etc/systemd/system/dashboard.service
[Unit]
Description=Chromium Dashboard
Requires=graphical.target
After=graphical.target

[Service]
Environment=DISPLAY=:0.0
Environment=XAUTHORITY=/home/pi/.Xauthority
Type=simple
ExecStart=/home/pi/dashboard.sh
Restart=on-abort
User=pi
Group=pi

[Install]
WantedBy=graphical.target
These are the interesting parts:
Requires=graphical.targetDon't start before we have GUI support readyEnvironment=DISPLAY=:0.0use the specified screenType=simpleto keep track of the script and its spawned pid
To enable the service use:
systemctl enable dashboard.service
Configure Raspberry Pi 4 Display Output
Per default your Raspberry Pi, like a regular computer, will put a screen to sleep if it does not detect mouse or keyboard input for a while. This is absolutely not what we want, so we'll need to fix that. Also we're going to use unclutter to hide the mouse cursor from the browser window.
We can do that with the following command:
unclutter -idle 0.5 -root &
You can set the output display by setting the DISPLAY environment variable with either specifying it before running a screen related command
export DISPLAY=:0.0
or by prepending it before running the command or script that will need access to it.
# don't "sleep" this display
DISPLAY=:0.0 xset s noblank
If you're going to use SSH to set up your pi while it's connected to only a screen, you'll most likely need to set the screen ENV variable since your ssh session does not have one assigned by default.
Starting Chromium in Kiosk Mode
Now, I'd love to use Firefox for this, but unfortunately starting the browser in the fullscreen mode is not yet possible. Technically you could use [xdotool][xdotool] to achieve this, but that will introduce some timing and more complexity.
Chromium on the other hand comes with plenty of cool command line options that are very useful to us.
/usr/bin/chromium-browser --no-first-run --noerrdialogs --disable-infobars --kiosk &
--no-first-runskips first run checks (like default browser, etc)--noerrdialogsshows no errors (you might want to exclude this while debugging)--disable-infobarsno crash warnings or "may we know your location"--kioskfullscreen mode
To make sure that we don't have chromium complaining about unclean shutdowns because we typically just tear out the USB-C cable or crash, we'll need to make it believe that everything went A-OK on the last shutdown when starting it after an incident:
sed -i 's/"exited_cleanly":false/"exited_cleanly":true/' /home/pi/.config/chromium/Default/Preferences
sed -i 's/"exit_type":"Crashed"/"exit_type":"Normal"/' /home/pi/.config/chromium/Default/Preferences
The full script can be found below and you should save it at /home/pi/dashbaord.sh
#!/bin/bash
xset s noblank
xset s off
xset -dpms

unclutter -idle 0.5 -root &

sed -i 's/"exited_cleanly":false/"exited_cleanly":true/' /home/pi/.config/chromium/Default/Preferences
sed -i 's/"exit_type":"Crashed"/"exit_type":"Normal"/' /home/pi/.config/chromium/Default/Preferences

/usr/bin/chromium-browser --noerrdialogs --disable-infobars --kiosk https://www.raspberrypi.org &
Remember to make the file executable:
chmod +x /home/pi/dashboard.sh
Now you can try it out and run it:
cd /home/pi
./dashboard.sh
Ideally, it should open the raspberry pi website, otherwise, see troubleshooting. If your test worked out, you can hit CTRL+C and start the service with:
systemctl start dashboard.service
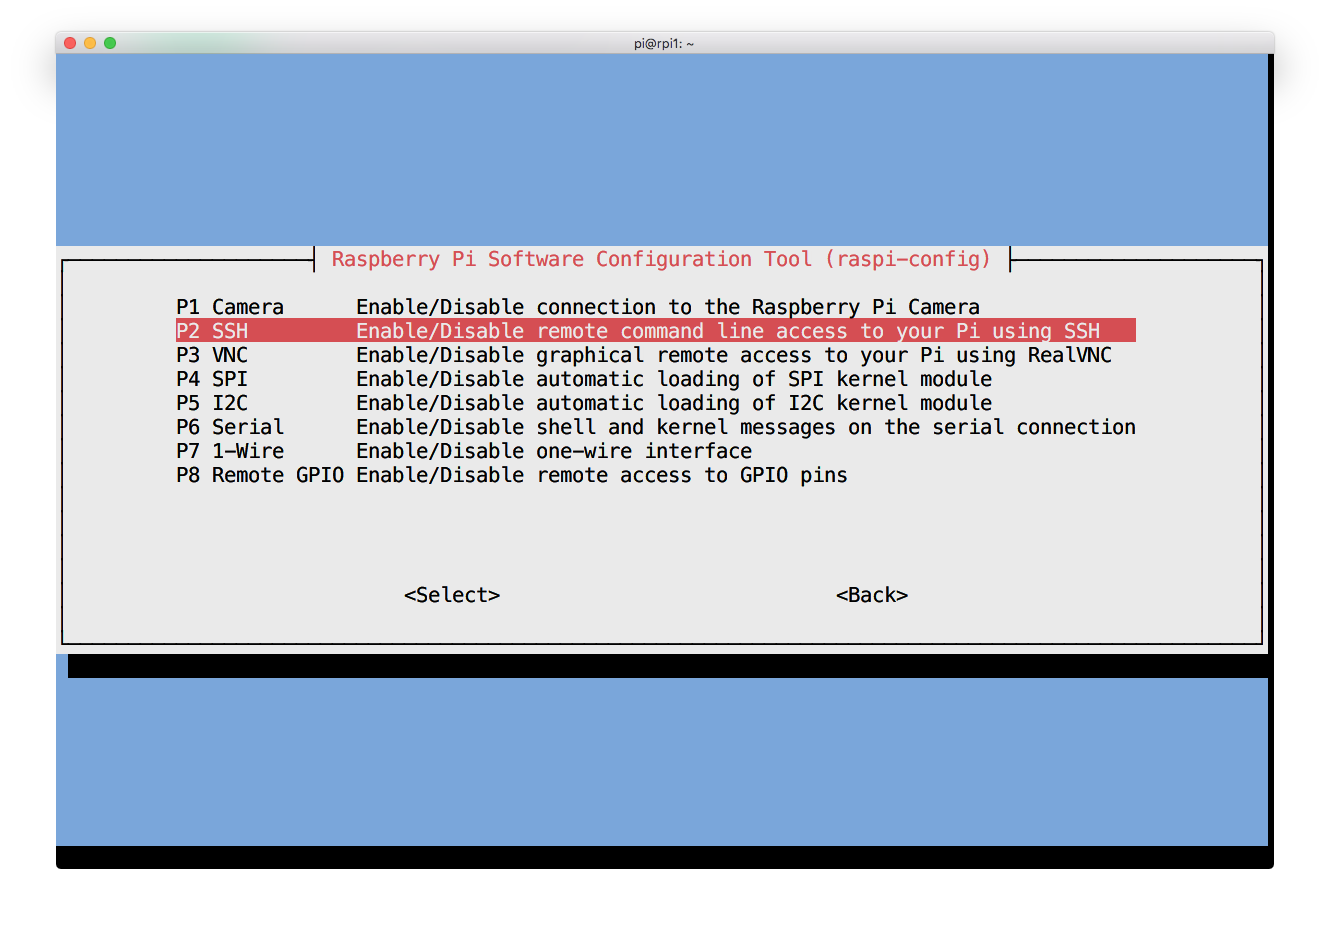
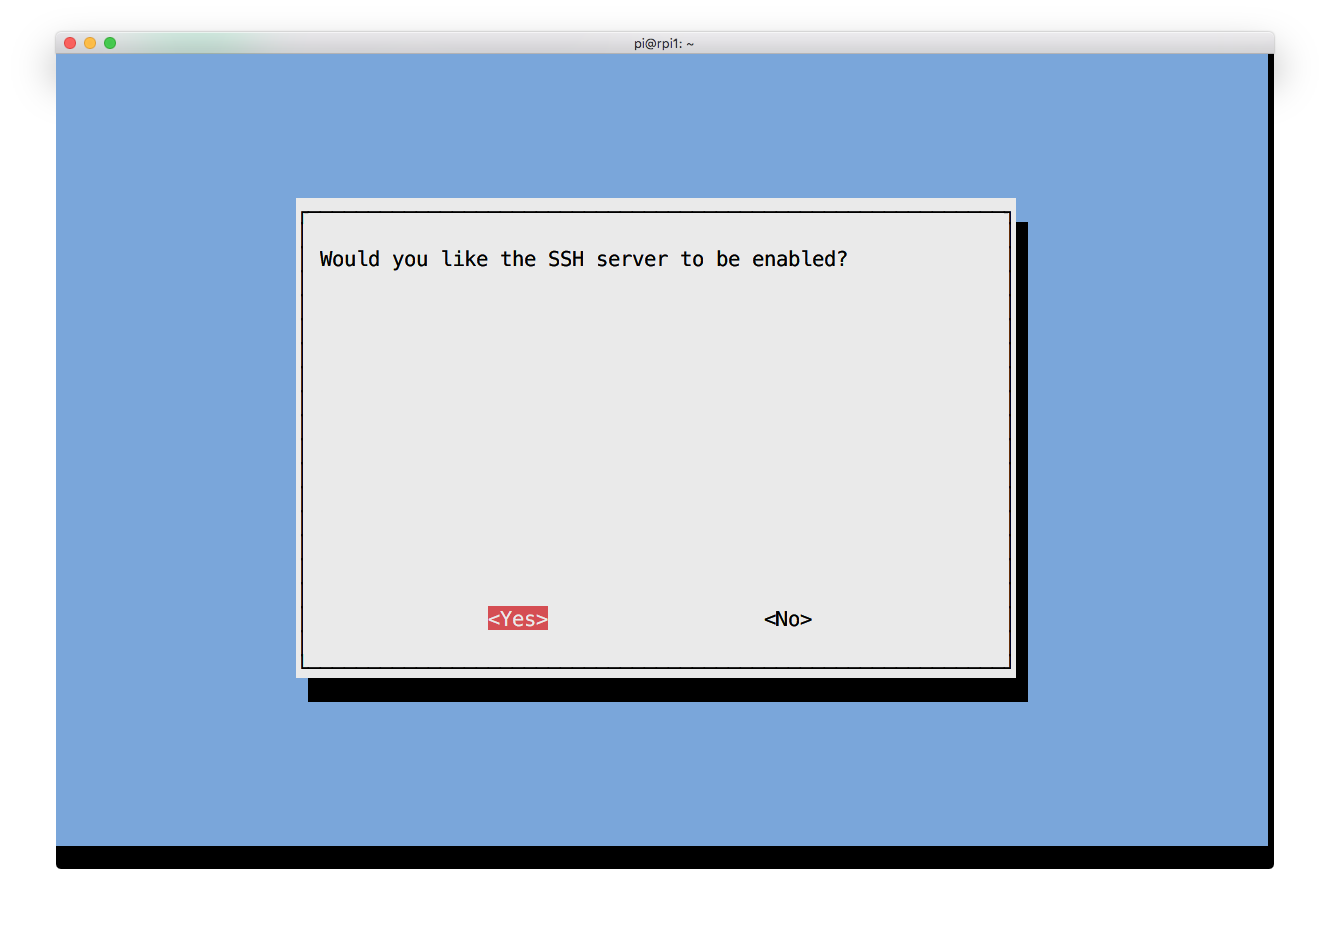
Enabling SSH remote access to your Raspberry PI
To remotely update or reboot your little dashboard pi, you can use ssh after enabling the SSH server through raspi-conf. This way you don't have to walk over to whatever physical location it's at unless it crashes or overheats.
Even then you can probably just kill the power and wait for it to boot and show your dashboard / website and use SSH again instead of acessing it via its own peripheral hardware.
Summary
Now you should have a super cool wall mounted, 55 inch wall display, displaying a website of your choice, that even in case of a power outage will power back up just fine.
If you run into any issues setting this up or operating this, please check the troubleshooting section below and reach out! Your comment or question is going to help others :)
Finally for the full test: Pull the power and put it back in (or sudo reboot)!
Credits to the post of pimylifeup for the chromium / systemd help.
Troubleshooting
If you change the hostname of your raspberry after starting Chromium for the first time, it will throw an error like
Chromium profile already in use on another computer, do you want to Relaunch and unlock?
The easiest solution to this is to connect a keyboard and hit enter, that should fix it permanently.
Chromium crashes while trying to display a complex website
SSH into your raspberry pi and keep htop open. Keep an eye on the consumed memory and swap space right underneath. One of my PIs continued to crash and I increased the swap space to 2GB and the swap usage stabilised at 250MB, even though there was still empty RAM. Somebody familiar with Linux and memory management can probably tell you why, I can't.
The most common error message is: Virtual memory exhausted: Cannot allocate memory.
If your Raspberry PI runs out of swap space you can increase it by editing /etc/dphys-swapfile, if you're on the command line:
sudo nano /etc/dphys-swapfile
# or
sudo vi /etc/dphys-swapfile
and set CONF_SWAPSIZE to something more than 100 (default unit is MB). I set it to 2048 which turned out to be excessive. If you can get away with it, disable swapping, which I don't think I should on the 1GB RAM PI.